Alright, so I finally decided to really get to grips with the wrap and turn heel. I’ve seen it in so many patterns, and honestly, I’ve been avoiding it. My usual go-to is a flap and gusset, which I can practically do in my sleep. But, you know, new techniques keep things interesting, right? So, I thought, “Today’s the day.”
Getting Started with the Wrap and Turn
First things first, I pulled out some leftover sock yarn. Nothing fancy, just a sturdy wool blend that I wouldn’t cry over if I messed it up completely. And trust me, I fully expected to mess it up. I grabbed my usual 2.5mm needles. I’d watched a few videos on how to do the wrap and turn – some made sense, others just made my head spin. Everyone seems to have their own little tweak to it.
I cast on enough stitches for a small practice swatch, like a mini sock cuff, and knitted a bit in stockinette. Then, it was time to actually start the heel shaping. The pattern I was vaguely following said to work across a certain number of stitches, then do the first wrap and turn. Simple enough, I thought.
The Actual Wrapping and Turning Drama
Okay, so the first wrap. On the knit side. Slip one, bring yarn to front, slip the stitch back to the left needle, turn. Sounds straightforward. My first few attempts, though? The wrap felt either way too loose, like it was just flopping there, or so tight I was worried I’d never be able to pick it up later. I probably re-did that first wrap and turn about five times before I felt it was even remotely okay.
Then, purling back and doing the wrap and turn on the purl side. Slip one, bring yarn to back, slip stitch back, turn. For some reason, this one felt even more awkward. My tension was all over the place. I kept getting confused about which way the yarn was supposed to go. I could feel a little hole forming already, which is exactly what you’re trying to avoid with these things!
I worked a few more short rows, wrapping and turning on each side. It was a slow process. I had to really concentrate on:
- Which stitch to slip.
- Which way to bring the yarn.
- Slipping the stitch back correctly.
- And then actually turning the work.
My hands felt clumsy. I remember thinking, “This is supposed to be neater? It looks like a dog’s breakfast right now.” The yarn kept trying to snag, or the wrap wouldn’t sit nicely next to the stitch.
Picking Up Those Wraps – The Next Hurdle
After I’d done all the decreasing short rows, it was time to start working back across the heel stitches and picking up those wraps. This is where I’d heard things can get really fiddly. The idea is to knit or purl the wrap together with the stitch it belongs to, to close up any potential gap.
On the knit side, finding that little loop of the wrap wasn’t too bad. I used the tip of my right needle to lift it onto the left needle, then knitted it together with the stitch. Okay, that looked pretty decent. A small victory!
But then, the purl side wraps. Oh boy. Finding the wrap felt harder, and then trying to purl it together with the stitch neatly? My first couple looked awful. Just a messy bump. I unpicked them. I tried again, really focusing on getting the needle under both the wrap and the stitch in the right way. It took a lot of squinting and careful maneuvering. I found that making sure the wrap was positioned correctly before trying to purl it with the stitch was key. If it was twisted or hiding, it just made a bigger mess.
The Outcome and My Thoughts
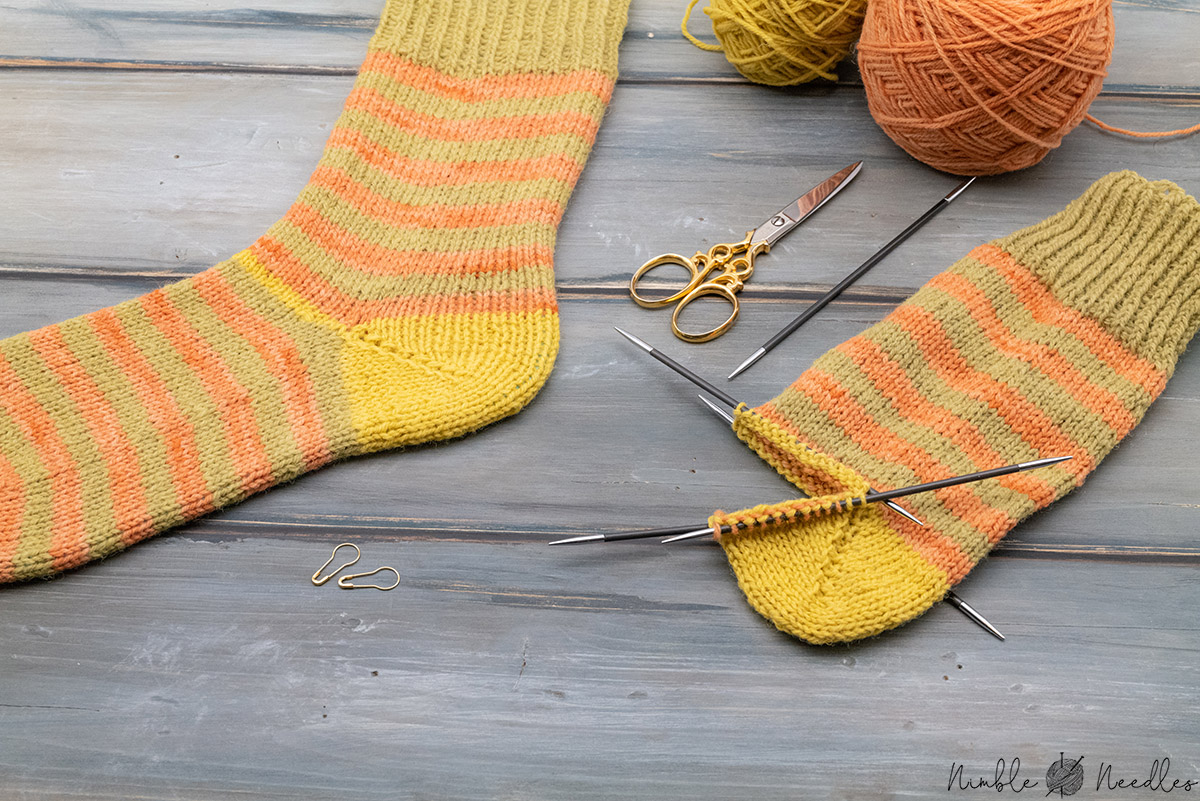
So, after what felt like an age, I finished my little practice heel. Did it look perfect? Absolutely not. Was it better than my first attempt an hour ago? Definitely. I could see the characteristic shallow cup shape of the short row heel forming. There were still a couple of spots where the tension was a bit off, maybe a tiny gap here or there if I really looked closely. But overall, it was recognizably a wrap and turn heel.
What I learned is that tension is everything with this technique. Too loose, and you get holes. Too tight, and picking up the wraps is a nightmare. It needs that Goldilocks ‘just right’ touch. And honestly, practice. I can see that after doing it a few times, your muscle memory would start to kick in.
I’m still not sure if I prefer it to a flap and gusset for every sock, but I’m glad I finally sat down and worked through it. It’s another tool in the knitting toolkit, right? I think my next step will be to try it on an actual sock, maybe with some self-striping yarn to see how it affects the pooling. That’ll be another adventure!

